Support
How Various Parts of Storage Spaces Work ?
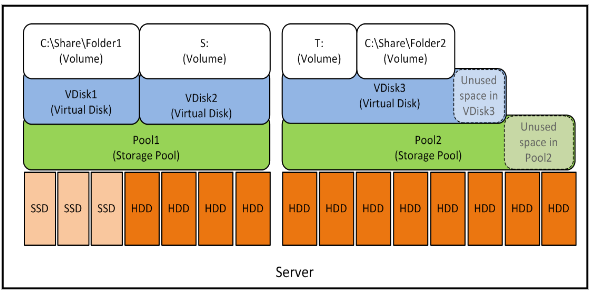
Windows Storage Spaces allows you to pool together all the spaces in hard disks, and divide the space out again, as illustrated in the diagram below…
Why would anyone want to combine the space and divide them out all again? It allows you to have flexibility and fault tolerance. But first, we need understand how various parts of Storage Spaces work. When we look at how the various parts work, we can see how the flexibility and fault tolerance come in.
Here are the various components:
1. Physical disks.
It has to start here. No disks means no space. More disks means more space. The physical disks are automatically detected by Windows Server 2012 if the hardware supports hot swappable hard disks.
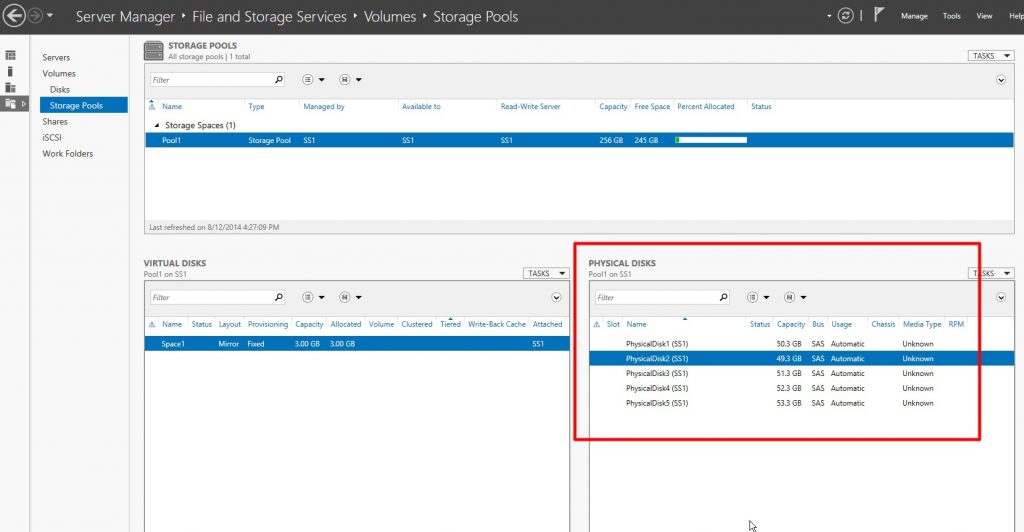
The picture below shows the physical disks detected by my server. (The sizes of the disks look funny because I am using a virtual server, and the disks are not real hard disks. Microsoft does not support this way of doing things for production, i.e. using Storage Spaces in a virtual server, but it is allowed to work so that people like all of us can use virtual machines to learn how it works.)
2. Storage Pools
The spaces from the physical disks are combined into Storage Pools. During the creation of a storage pool, you will be asked to select the disks for storage pool. In the example below, I selected all the physical disks for 1 storage pool. In real life, there is no need to select all the physical disks. You can choose, for example, physical disks 1 – 4 for 1 storage pool, physical disks 5 – 9 for another storage pool.

3. Virtual Disks
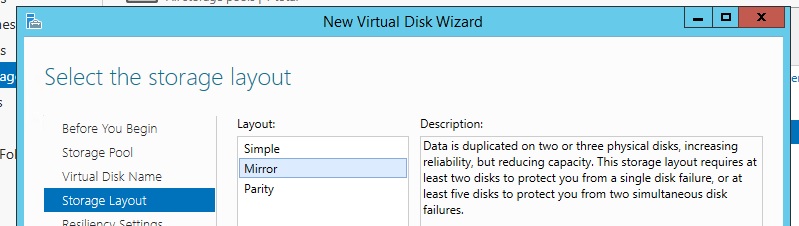
Not to be confused with Hyper-V’s virtual hard disks (vhd). This “virtual disk” here is made from a storage pool. It is also during the creation of this “virtual disk” that the level of fault tolerance and performance is decided.
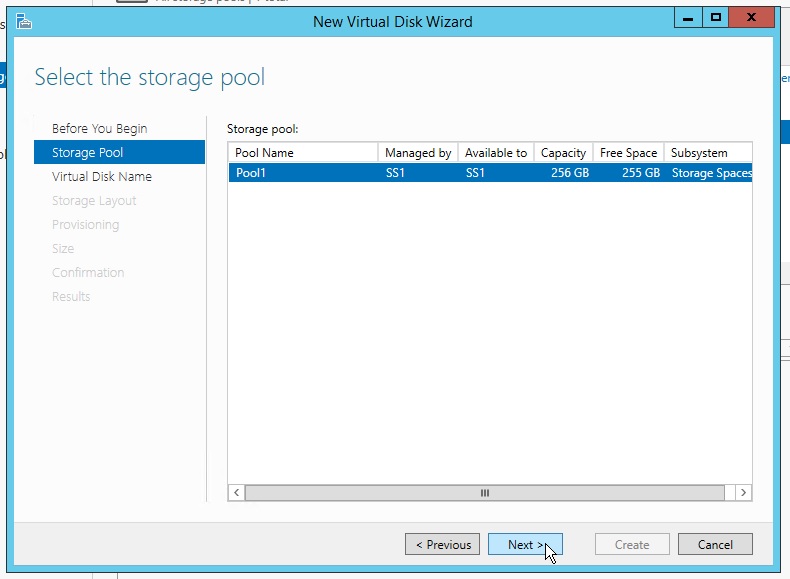
When creating a new virtual disk, the space of the virtual disk has to come from somewhere. The space comes from the storage pool. In the example below, I have only 1 storage pool called “Pool1”.
It is during the creation of the virtual disk that you decide how much performance and fault tolerance that virtual disk should have. The next few images illustrate these features.
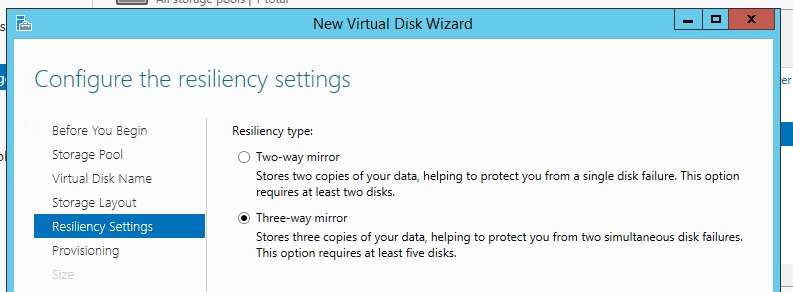
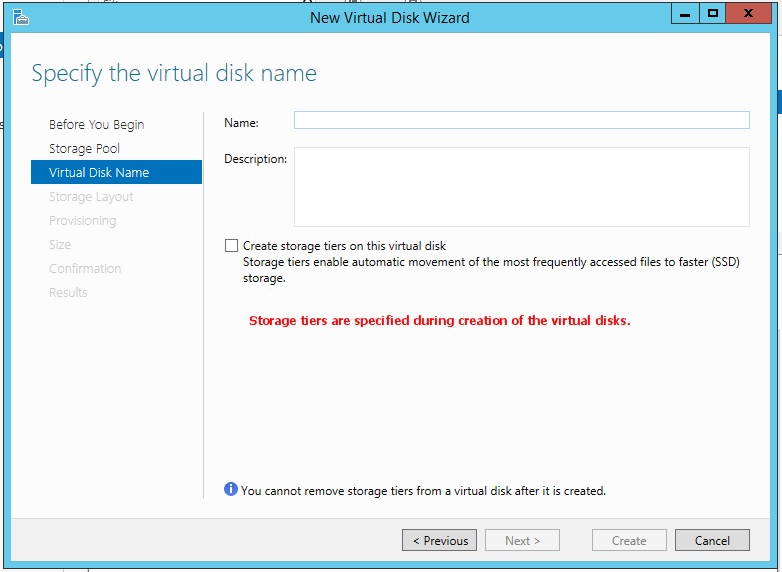
If you have SSDs in the storage pool from which you are creating the virtual disk, you can also enable the “storage tier” feature. The image below illustrates where in the process it is enable, and also explained a bit on what the feature is about.
4. Volumes
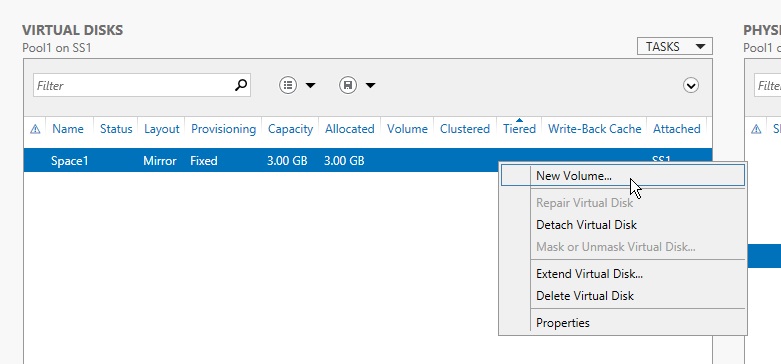
Volumes are created from virtual disks. 1 virtual disk can have 1 or more volumes. In the example below, I am about to create a new volume from the virtual disk called “Space1”.
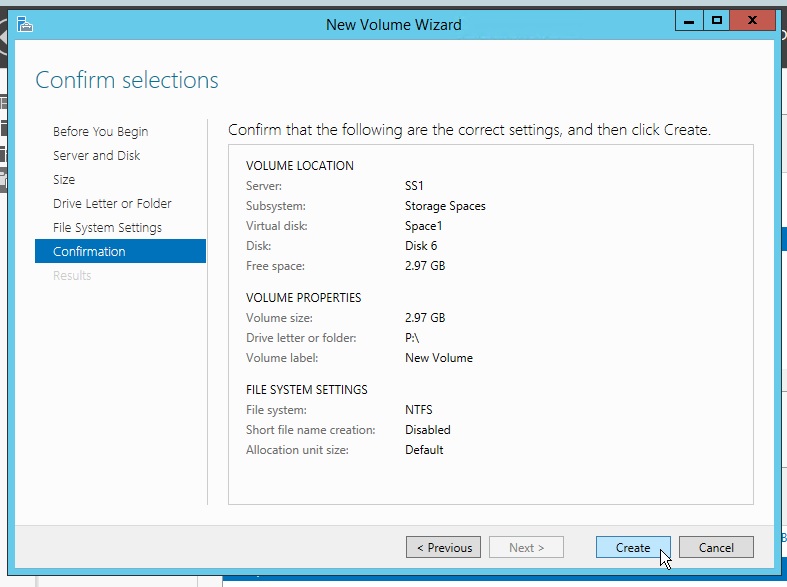
Usually, useful things can be done only after the volume is created. In this example, I have created a volume, and assigned it the drive letter “P”. When the creation process is done, I will have a “P” drive in the server, and I can start putting files inside this “P” drive.
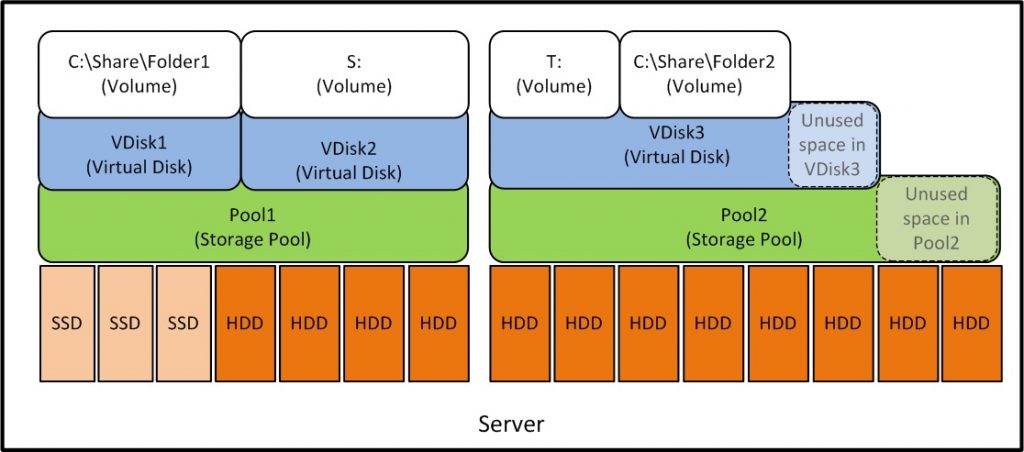
To recap, let’s look at this picture again…

- Physical disks make up Storage Pools, which make up Virtual Disks, which make up Volumes, and we start putting our files in the volumes.
- Fault tolerance and performance are configured when creating virtual disks.
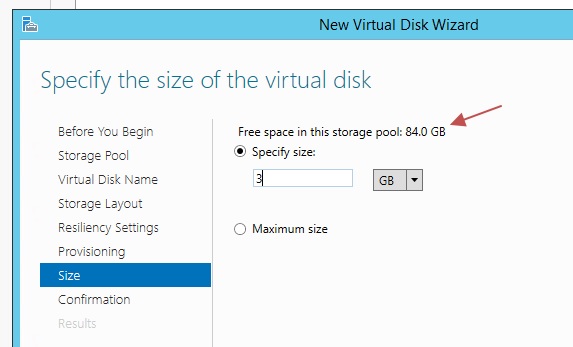
From the picture above, we can also see that we do not have use all the space in the storage pools and virtual disks. In the example below, I have 84GB free space in the storage pool, but I chose to use only 3GB for my virtual disk.
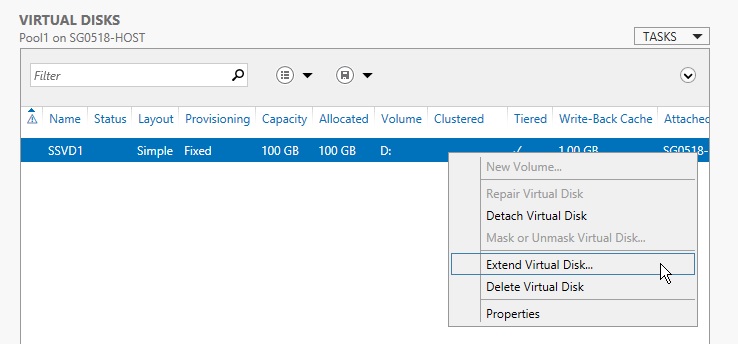
The unused space can be used to increase the free space of the virtual disks or volumes at a later time. The image below shows how to start adding space to a virtual disk. Note that the size of the virtual disk is 100 GB.
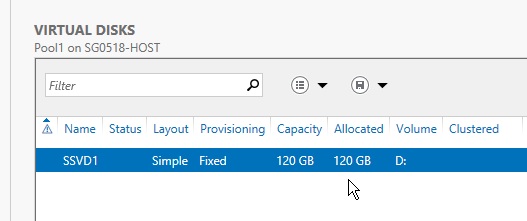
This virtual disk is from a storage pool that has SSDs. I can configure the “storage tier” feature and increase the space of the virtual disk at the same time.

Notice that the size of the virtual disk is now 120 GB.
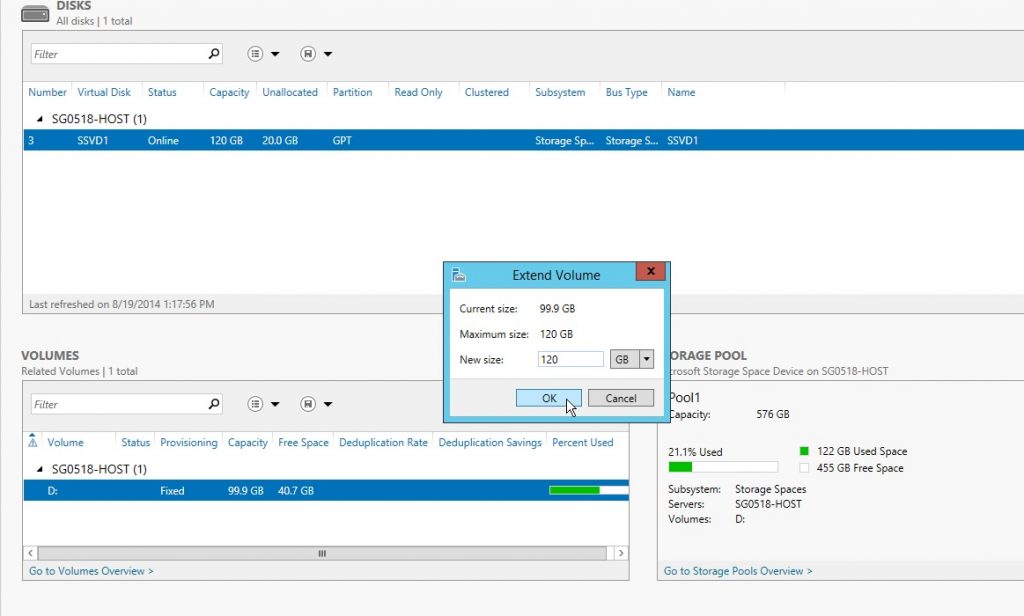
The extra space in the virtual disk can also be given to a volume that is created from the virtual disk. The image below gives a brief idea of the process. (Note that volume “D:” is made from virtual disk “SSVD1”, which is made from storage pool “Pool1”.)
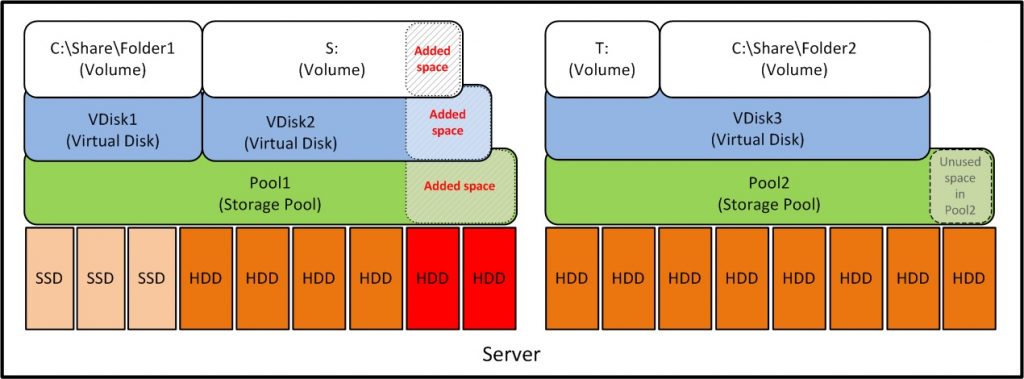
Let us look at this picture again…
What if we need to increase the space available in volume “S:”? The space in Virtual disk “VDisk2” is entirely used up, and storage pool “Pool1” is entirely used up.
Just add more hard disks, then right click the storage pool in the GUI, click “Add Physical Disk…”, then add more space to (i.e. “extend”) the virtual disk, then add more space to (i.e. “extend”) the volume.
We have seen how Windows Storage Spaces allows you to have fault tolerance and flexibility when managing your hard disks.
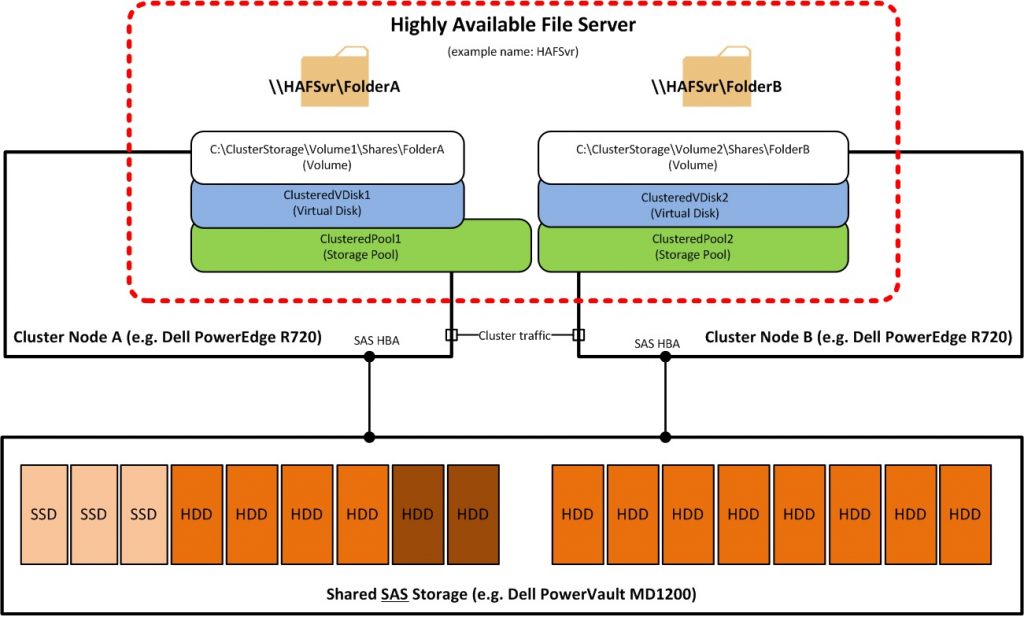
But what if the entire server dies? Take 2 servers and cluster them like this…
Note: When doing clustering, it is important to use supported hardware. I have not personally tested the above configuration using real hardware, so I’ll provide the references.
- Dell Powervault MD1200
http://en.community.dell.com/techcenter/os-applications/w/wiki/5281.deploying-windows-server-2012-r2-storage-spaces-on-dell-powervault.aspx- Dell PowerEdge R720 and other hardware information.
http://www.aidanfinn.com/?p=15886- Please also note recommended number of SSDs for optimal performance.
http://msdn.microsoft.com/en-us/library/windows/hardware/dn567634.aspx- To check whether your hardware is supported by Microsoft, please also visit “Windows Server Catalog” at
http://www.windowsservercatalog.com/
With the above setup, there is no single point of failure. (The “Shared SAS Storage” is not a single point of failure because it is supposed to have 2 controllers, as depicted by the 2 points touching it. Each controller can be thought of as a motherboard with its own CPU, RAM, etc. How would we know whether our hardware has 2 controllers which can failover, etc?
That is why it is important to choose the correct hardware, which is why I provided the references. If you intend to use the Dell Powervault MD1200 for example, it is important that you read the article referenced above so that you know that your hardware is properly configured.)
In the next article, we will use virtual machines to practice creating a setup similar to the above, so that when we have the hardware, we know what to do.